In this tutorial, I walk through several ways to record guitar and bass directly into StudioMini on iPhone. If you prefer video, watch the full walkthrough below.
TL;DR – Quick Answer
To record guitar on iPhone using StudioMini, you can use the built-in microphone, or plug in and use a USB audio interface. You can use your acoustic guitar, your electric with a mic’d amp, or go direct with an amp simulator or preamp. StudioMini will capture the audio in pro quality and let you layer tracks, mix by adjusting levels and pan, and build your full song.
Table of contents
Introduction
Recording guitar or bass on your iPhone is easier than ever, and StudioMini gives you several flexible ways to capture great sound wherever inspiration strikes. In this guide, I walk through different recording setups—from using the built-in microphone to working with an audio interface, amp simulation, or a clean DI chain—so you can choose the method that fits your music and your environment.
Recording Guitar with the iPhone’s Built-In Microphone
Recording Acoustic Guitar (No Multitracking)

- Let’s start with the simplest example of using my iPhone’s built-in mic to record my acoustic guitar. Let’s say I just came up with a song idea and I want to quickly record it, to make sure I don’t forget it.
- In StudioMini I’m going to create a new Project, which automatically record-enables track 1. This means I’m now ready to tap record to get started.
- I’m going to start playing a bit, and I’m looking at track 1’s meter to give me a sense of how hot the signal is. I’m going to adjust how close to my guitar my iPhone is, and now I’m ready to start recording.
Recording Electric Guitar and Amp with a Drum Loop

- Now let’s record something with my electric guitar. In this example I’m going through a couple of pedals into my amp, and I have the amp volume fairly low because I’m at home and can’t play too loud right now.
- I came up with a riff idea, and I want to play along with drums, so I’m going to find a Loop that fits my idea.
- In the last example we were just recording a single idea, so we didn’t have to think about multitracking and what we call “track bleed”. Since we now have drums to play along to, we’re multitracking and we need to make sure the audio we’re recording is isolated – in other words we don’t want the drums being played back to be re-recorded onto our guitar track.
- Any time we’re multitracking, we need to be using headphones – this is a must if we want clean tracks that can be mixed well. I’m going to use a simple 3.5mm to USB-C adapter, and I’m going to plug in my wired headphones.
- This is another important point – the headphones need to be wired because wireless uses Bluetooth, and that technology has inherent audio latency. Recording with latency would make our performance sound “off” which would range from sounding completely terrible, to just not feeling right. Either way, wired headphones is the way to go, so there is no latency.
- The adapter we’re using only provides a stereo output, which means that for input we’re still using the iPhone’s built-in mic.
- So let’s place my iPhone near my amp, again using StudioMini’s meter to help me understand how close to get. I don’t want it to barely register a signal, but I also don’t want it in the red.
- Ok, now we’re all set – let’s go ahead and record!
Recording Guitar on iPhone with an Audio Interface
Recording a Mic’d Guitar Amp Using an Audio Interface
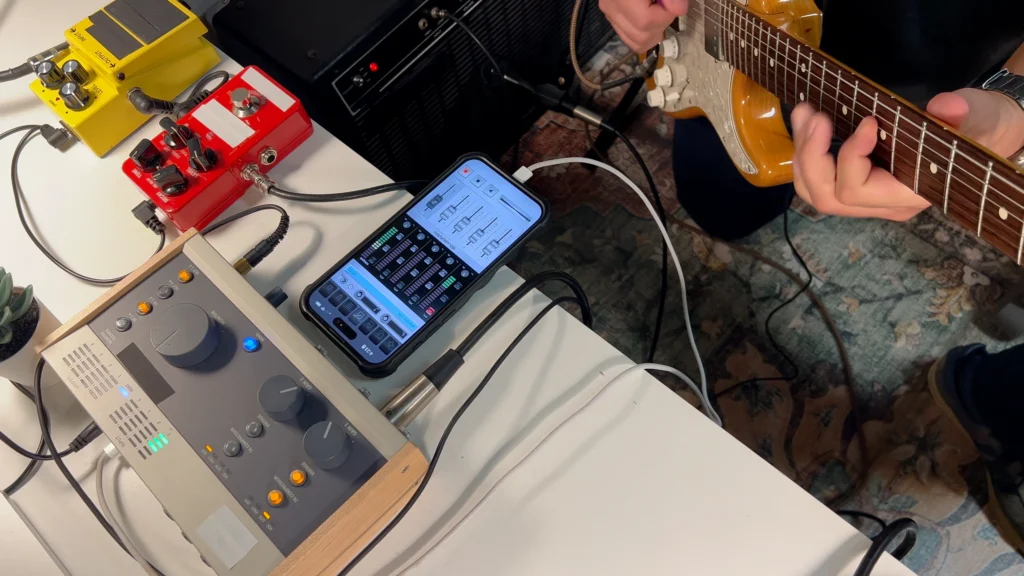
- Next let’s take that riff and start working on it as a produced song that I can either mix in StudioMini to create a pro quality demo, or expand the production by for example sharing with a producer to continue the work in tools like Logic or Pro Tools.
- I’m going from my guitar to my pedals to my amp. I’m then mic’ing my amp, then taking that XLR cable into my USB audio interface, which includes a built-in preamp. I’m then plugging my interface into my iPhone with a USB-C cable, and I have my headphones plugged into my interface.
- Since we’re multitracking, I need to be able to hear everything in my headphones, which means I need to monitor the audio from my guitar as I’m recording. I have 2 methods of doing that when using an audio interface – I can either use the interface’s hardware input monitoring, or I can use StudioMini’s software input monitoring. Both are great options – you can try both and see what works best for your setting. StudioMini’s software input monitoring is versatile, especially in situations where you don’t have the option to monitor from your audio interface or mixer hardware.
- Ok, we’re all set, let’s go ahead and record!
Recording with an Amp Simulator (Direct Guitar Setup)
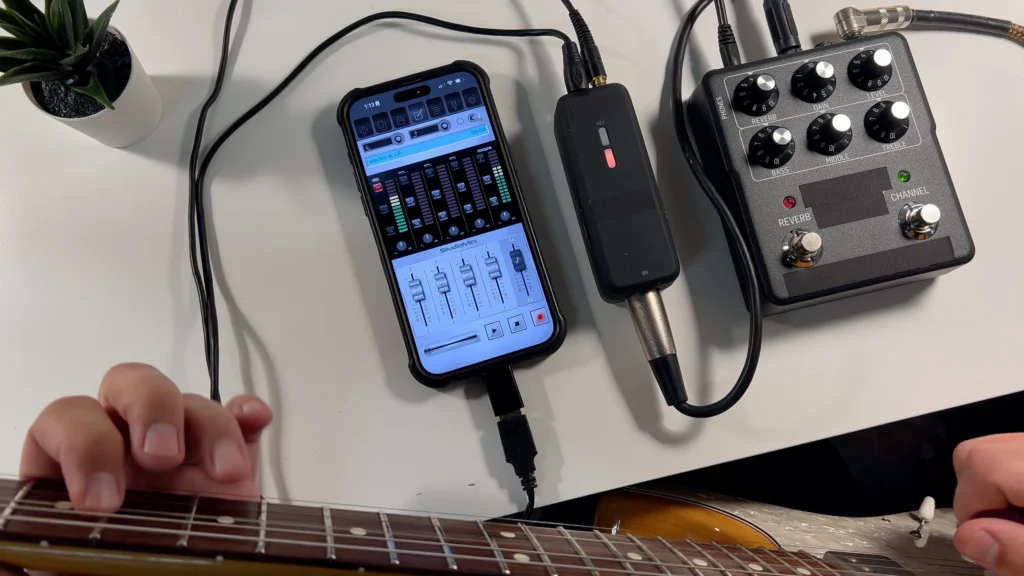
- Next we’ll go direct, which is especially useful if for example I’m in a setting where I can’t use my amp. Maybe I’m in a hotel room, maybe I’m in an apartment, but I still want my recordings to sound pro.
- I’m going to do the same thing again, but with an amp simulator this time.
- My simulator has overdrive and reverb, so I don’t need my pedals this time around. I’m going from my guitar straight into my amp simulator, and from there into a smaller battery powered USB audio interface, which is then plugged into my iPhone. And finally I have my headphones plugged into my interface.
- Ok, we’re all set, let’s record!
Recording Bass DI Using a Mixer or Preamp
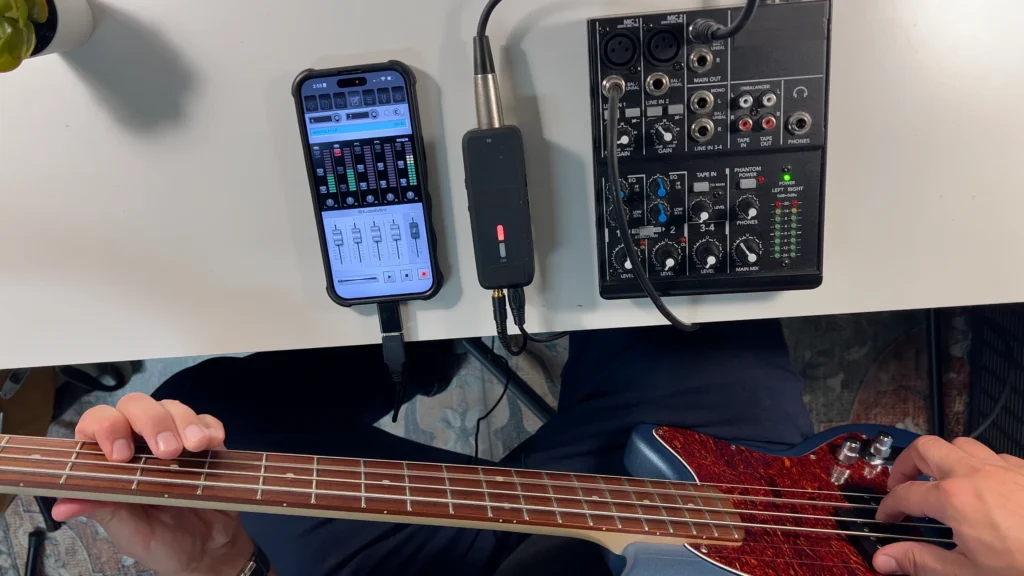
- Let’s add some bass next!
- For this I don’t need an amp simulator – I just want a nice full direct tone. I’m going to use a small mixer as a preamp, plugging my bass into the mixer’s first channel and setting the gain for a good quality clear signal going into StudioMini.
- I’m then plugging my mixer into my portable audio interface, which is going into my iPhone, and I have my headphones plugged into the interface.
- That’s it, pretty straightforward – let’s go ahead and record!
Conclusion
These examples cover several effective ways to record guitar or bass on your iPhone using StudioMini. Whether you’re capturing a quick acoustic idea, recording an amp, going direct with an amp simulator, or tracking bass with a DI, StudioMini gives you the tools to work quickly and stay creative. Experiment with different setups to find the approach that fits your style and your environment.
If you found this guide helpful, be sure to explore more StudioMini tutorials on the blog for deeper dives into recording techniques and workflow tips.
Download StudioMini
Ready to start recording on your iPhone? StudioMini is designed to help you capture ideas quickly, layer multiple tracks, and create polished recordings wherever you are. Try it free today on the App Store.